We can create list of values (LOV) for any parameter in discoverer reports through Item Classes. Here suppose in Discoverer Report, we have a parameter called Period Name. It has a small LOV icon in the right side.

When clicked on the LOV icon, the below window with all the Period Names will appear where you can choose one or many period names.
Now the question is how to do this. You just need to do the below steps to accomplish this task.
1] Create a custom folder named ‘Time Periods’ in a business area with the below query.
1
2
3
4
5
6
7
8
9
10
11
12
13
14
15
16
17
| select distinct period_name, period_num, period_year, decode(period_num,1, 'January', 2, 'February', 3, 'March', 4, 'April', 5, 'May', 6, 'June', 7, 'July', 8, 'August', 9, 'September', 10, 'October', 11, 'November', 12, 'December', null) month_namefrom gl_periods; |
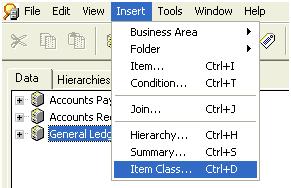
2] Select the business area in which you want to create an item class. Choose Insert > Item Class.
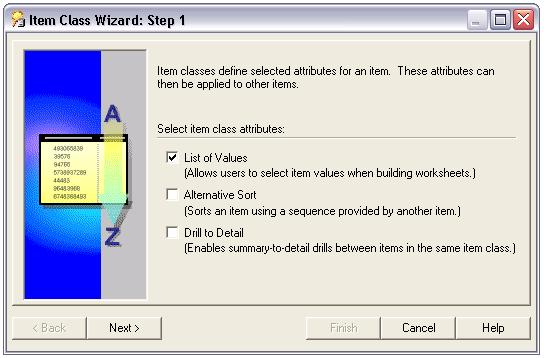
3] Select the LOV Item class attribute.
4] Select the above created folder (Time Periods) and choose the Period Name column.
5] Here you can select the various items of other folders that can use this item class. You can skip this stage and later you can manually assign this item class to other items.
6] Choose the defaults and click next.
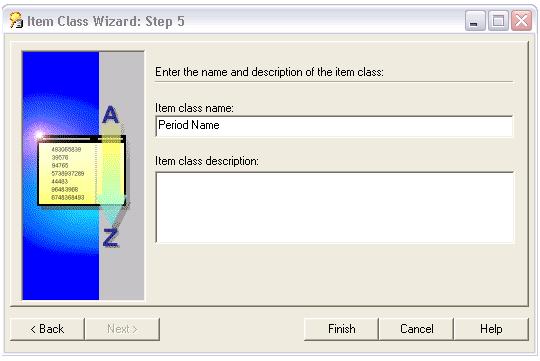
7] Give a suitable name to the Item Class
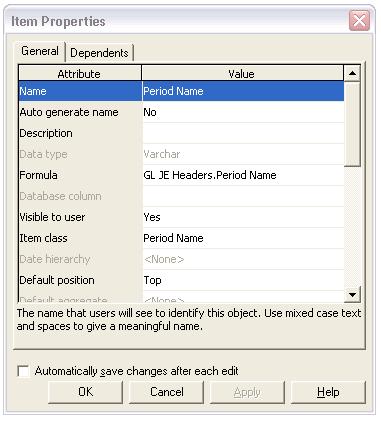
8] Now go to the Item of the folder on which you created the Parameter (Period Name) and then go to Item Properties. Here you assign the item class that you have created just now.
9] If you already created the parameter in your workbook and your discover plus or desktop is open then close it and reopen. Then you can view the LOV attached to the parameter.
10] If you haven’t already created the parameter, then create the parameter and run the report. You can view the LOV attached to the parameter.


No comments:
Post a Comment